"Have a Biscuit, Potter." Ornament
- Stephanie

- Dec 13, 2019
- 5 min read
Professor McGonagall: "Is it true that you shouted at Professor Umbridge?"
Harry Potter: "Yes. "
Professor McGonagall: "You called her a liar?"
Harry Potter: "Yes."
Professor McGonagall: "You told her He-Who-Must-Not-Be-Named is back?"
Harry Potter: "Yes."
Professor McGonagall: "Have a biscuit, Potter."

A professor would normally frown at the thought of a student disrespecting another adult but when Professor McGonagall rewarded Harry's behavior towards Umbridge by offering him a Ginger Newt biscuit from the tin on her desk, we all cheered.
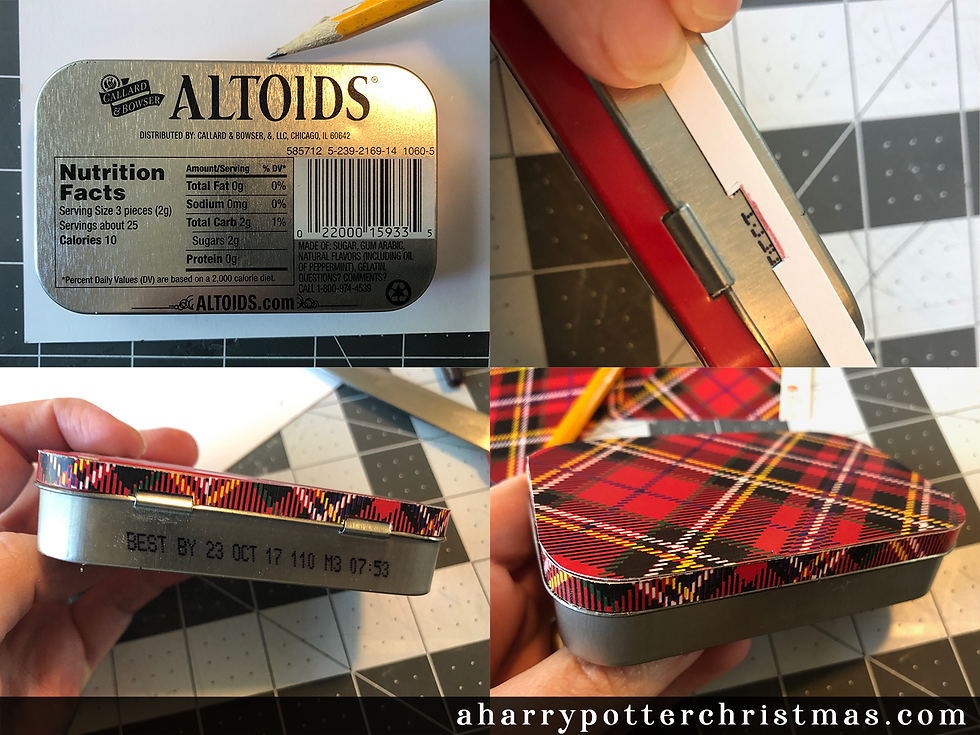
For making a biscuit tin ornament, an Altoids tin seemed like an obvious choice, well sized and something I already had on hand. I would have preferred a tin without any embossing on the lid but a small inconvenience for being a free supply. My first couple of tins were covered with scrapbooking paper purchased at Hobby Lobby. The paper did not cover the embossing well but I don't think that was overly noticeable in the finished ornament. My next couple of tins were covered with a lovely heavy paper that I bought at www.scrapbooking.com, which covered the embossing very well and proved to be easier to work for this project.

I chose a plaid paper for the tin because the book naturally indicated that the tin on McGonagall's desk was a tartan pattern. Erin designed the cute quote on the top for me, which I decided would look extra cute with McGonagall's hat hanging off the corner of it. I still felt like the tin needed a little something so I made a miniature biscuit out of clay to go on top. I know that technically the biscuit offered to Harry was a ginger newt (in the shape of an actual newt!) but my clay skills were just not up to the task. I'm still very happy with how my little round biscuit looks on the tin.
Supplies Needed:
Altoids tin
Plaid scrapbooking paper (look for a smaller scale pattern because a larger pattern would get lost on the small tin)
Optional: Coordinating Christmas scrapbook paper for the inside of the tin
Cardstock in these solid colors: black, tan, green, and white.
Scissors
Craft knife
1/8" round hole punch
Sharpie marker, fine point
Glue Stick
Super glue
Mod Podge, gloss
Paint brush
Polymer Clay, white and tan
Clay roller
Bamboo skewer or toothpick for poking holes in your clay biscuit
Tan acrylic paint
Gold hanging string
Hat and feather templates (linked in tutorial)
Quote printable (linked in tutorial)
OPTIONAL: cutting machine such as a Cricut or Silhouette
Step 1:
The first step is to cover the Altoids tin with your chosen paper. I started with the upper rim, it's as simple as holding your paper up to your tin and marking it with a pencil, then using a paper cutter to trim it to size. Use a craft knife to create notches in your paper to fit around the hinges in the back. Use a glue stick to affix the strip in place. Next, trace and cut the lid top, and glue that in place. Move on to the bottom of the tin and repeat these steps.

Step 2:
If you would like to decorate the inside, now would be a good time to do it. I traced the tin bottom on the same plaid paper as the outside, and trimmed inside the line to fit the inner lid and bottom. You could also use a coordinating Christmas paper. I skipped lining the sides of the inner tin out of laziness, but you'd have my complete admiration if you took the extra step to do those, too.

Step 3:
Print the hat and feather pattern.
OPTIONAL: If you have access to a cutting machine such as a Cricut or Silhouette, you can use this transparent PNG to upload to your cutting software. Cut the hat from black card stock at 2.25" in width, and the feather from tan or gold card stock at 1" in length.
To cut hat and feather by hand:
Trace the hat pattern onto black cardstock and the feather onto tan paper. There is also a full color print and cut file below if you do not want to buy colored sheets.

Step 4:
Feather and dot details, assemble the hat.
The decorative green dot was created with a 1/8" paper hole punch. You could also color white card stock with a green marker and hole punch the dot. A fine line sharpie was used to draw lines on the feather and a dot in the center of the green dot.
Use the photo below as reference and a glue stick to assemble the hat pieces; hat, feather tucked in behind the hat and the dot on top.

Step 5:
Trim the printed quote card with scissors. Again, you could print and cut by machine if you have access to a cutting machine.
To hang the hat off the quote card, use a craft knife to cut a slight curve in the brim of the hat. The quote corner will tuck into that slot you've created but use a little glue to keep it in place. Glue the quote card with hat piece onto the top of the tin.
Step 6:
Now cover the entire tin with a coating or two of gloss Mod Podge. I recommend lying the tin open facing downward, being mindful not to glue the hinge and the lip of the tin bottom such that you interfere with opening and closing the tin.
Step 7:
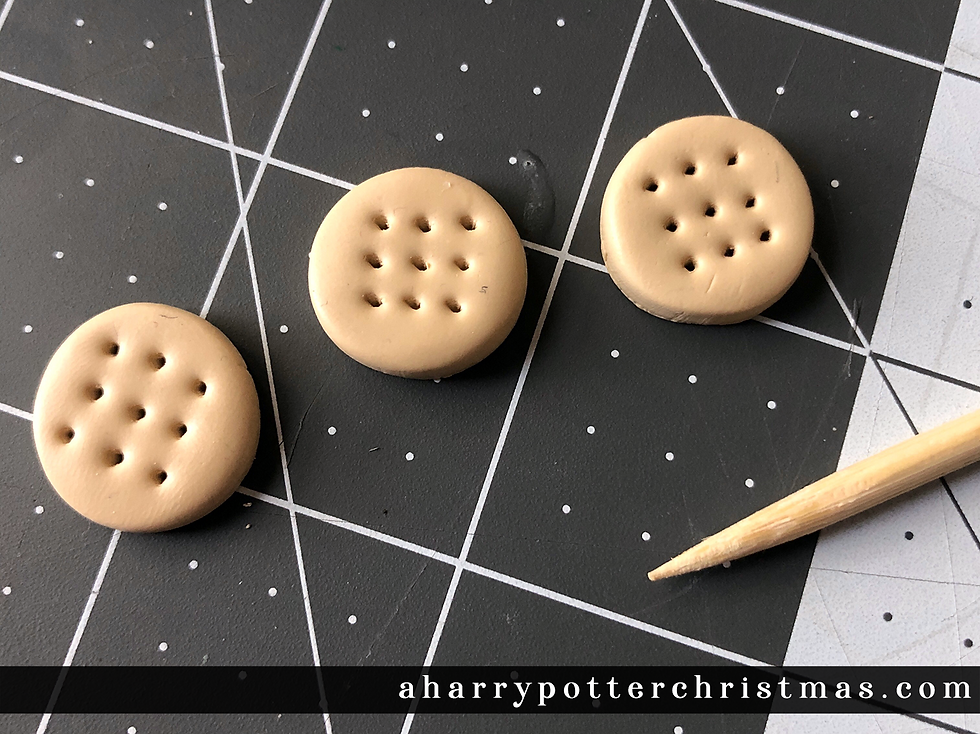
To make the biscuit for the top of the tin, I used a mixture of light tan and white polymer clay. I rolled the clay about 1/4" thick and used the end of my clay rolling pin to cut out the biscuit shape. A bamboo skewer was used to poke holes in the biscuit. It was then baked according to manufacturer's directions. The finished biscuit was very lightly dry brushed with some tan acrylic paint to give it some visual texture.
Super glue was used to attach the biscuit to the tin.

Step 8:
Make an ornament hanger by taking a length of gold string and tying a knot to create a loop. With the lid open, hook the loop over the lid and tuck the string close to hinges. The string essentially gets caught in that tight space. Make sure to face the knot down inside of the tin to keep it hidden.

BONUS:
The bonus part of this ornament is that you now have a hiding place on the tree for miniature gifts or treats! The tin is a good size for a gift card and some candies. I found some individually packaged shortbread at my local grocery that fit perfectly in the tin.
One of the Christmas traditions that Erin and I grew up with was an annual scavenger hunt. One lucky family member would follow a series of clues that lead on a crazy trip to all corners of the house, and even outside. The first clue was usually found in our mother's special Beetle Box that hung on the tree. I can just imagine a Harry Potter themed hunt that begins with a clue tucked in this little biscuit tin!


Comments