Flying Owl Book Page Ornaments
- Stephanie

- Dec 13, 2019
- 4 min read

During the early years of my kids' childhood, a special family moved into the rental house across the street from us. The family was making a pit stop in our college town so that the dad could complete his Phd. I quickly became close to the mom and the same can be said for our children and theirs.
For the two years she lived here, my friend Crystal and I spent much of our time crossing the street to visit with one another to share crafts, food, and our favorite books. Having a friend that convenient is as fabulous as you can imagine! They may have had to head off for different locales but our friendship has spanned the distance. Technology really helps with that! Crystal posted these cute book page ornaments a couple of years ago in Instagram, I was delighted with them.
Being the great gal that she is, she happily agreed to share how she made them on our blog. Her tutorial is published below. Thanks, Crystal!
-Stephanie

Supplies:
Mod Podge, matte
damp rag to clean Mod Podge off of your fingers
foam brush
paper plate
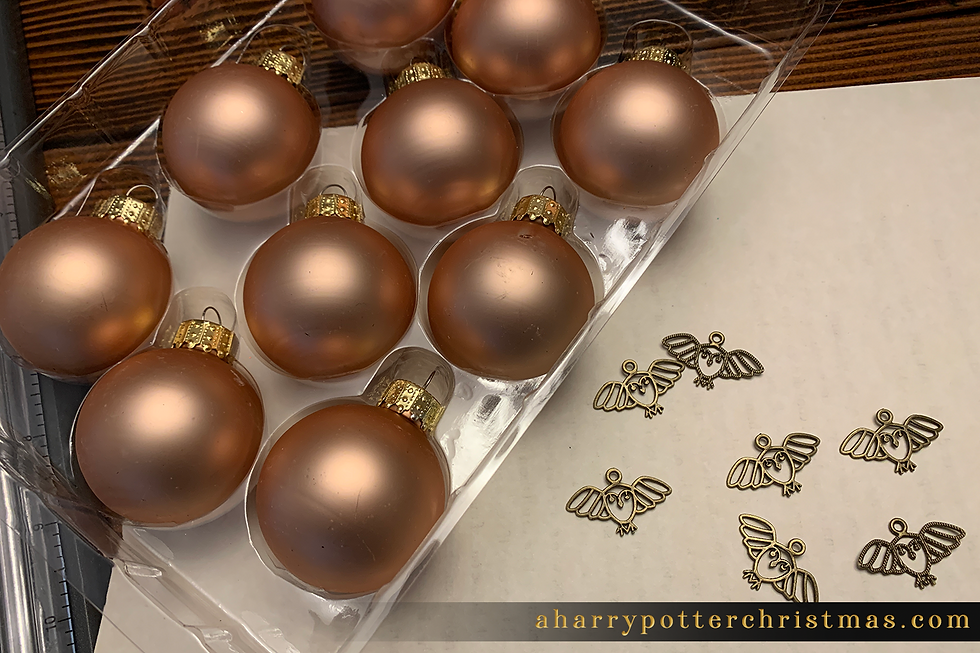
round ball/bulb ornaments, size and color of your choice, glass or plastic (the ones I use are the 1.7 in./45mm, 10 piece Ashland Christmas Noël ornaments, found at Michael's--use ones whose metal hanger caps are complementary to the color of your owl charms. As my charms are bronze, I chose ornaments with gold tops).
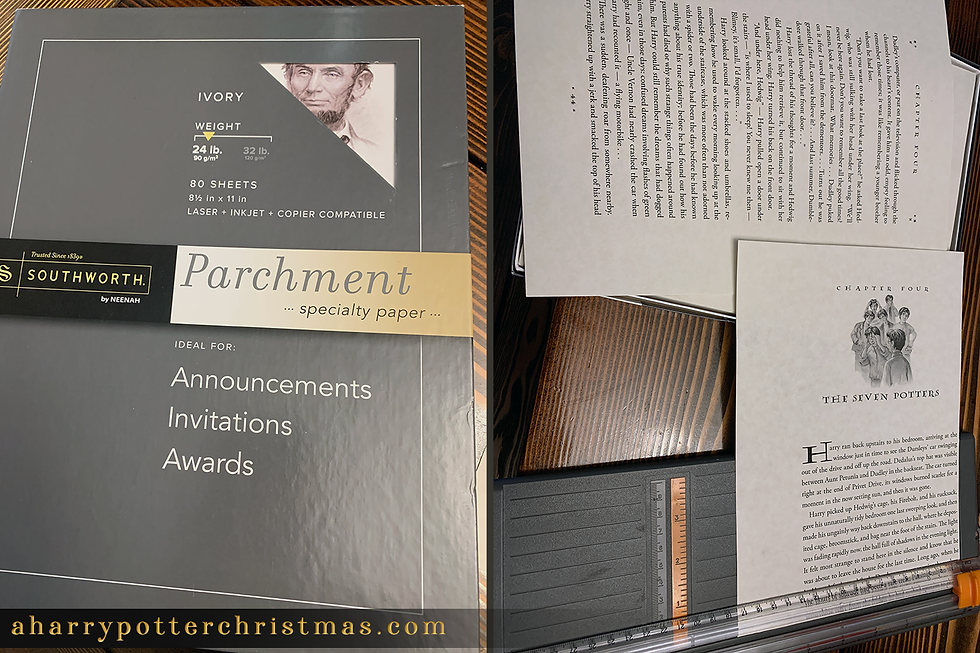
parchment specialty paper to print your pages onto
paper trimmer, Fiskars trimmers are my personal preference
craft scissors
toothpick
hot glue gun
hemp twine
ribbon, I used 1/4 in. grosgrain ribbon in the sample
owl charms (here is where I found the ones used for these ornaments)
printable PDF Harry Potter book chapter excerpts linked below, free for personal use on Scholastic's website. Select the chapter(s) you want to print for your ornaments. For example, when I made the ornament for my son, Aidan, I chose to use lines from Book 2, Chapter 2: "Dobby's Warning," since Dobby is his favorite character.
Instructions:
1) Print pages from your favorite chapter(s) in the Harry Potter series, using the links above.

I have a confession, I first attempted to photocopy pages of our favorite chapters directly from the books. Unfortunately, I could not get a clear copy, and wasted a bunch of paper in the process. My husband suggested in the future that I could use the tiny scanner app on my phone to scan individual pages and save them as PDF files to print. This would be ideal if you wanted to use text on your ornaments that is not included in the excerpts from the Scholastic links I included above.

Note: I have not tried doing this with pages printed from an ink jet printer, as our home printer is a B&W laser printer.
2) Trim the pages with your paper trimmer. I found this to be easier than using scissors to cut the pages into strips, plus my hands were quite happy with me for not putting them through unnecessary abuse. :) I first trimmed off the margins, and then cut the lines of text into strips.


3). Remove the metal hanger portion of the ornament. Set that part aside to keep it clean from Mod Podge residue.
Pour some of the Mod Podge glue onto your paper plate, and use a foam brush to spread a thin layer onto a section of your ornament. I find that it is easier to start by bisecting the ornament. Grab a paper strip, and starting at the top of one side of the ornament, smooth the paper across the ornament, Continue the process, adding more Mod Podge glue as necessary.
I find that I like to work in quarter segments, and then fill in the uncovered space between the paper strips I've laid down. Sometimes, I have a particular part of a quote or sentence I like, and will tear the paper to cover smaller areas.

After you have the strips glued onto your ornament, slightly overlapping, spread a thin layer of Mod Podge over all of them. Use your finger to try to work the glue under the paper strips while doing this. This process helps to seal the paper strips on your ornament, and gives it an even finish when it dries.
**You don't have to perfectly overlap all of your paper strips. Many of my ornaments have a tiny sliver of the base ornament showing in places. I found that it adds character, and a little bit of shine when the light hits it.
4) Set upside down to dry, in the plastic ornament tray. When dry, put the hanger back onto the ornament.

5). Plug in your glue gun. While it is heating up, cut small piece of hemp twine and thread it through the loop at the top of the owl charm. Set aside.
Grab your ribbon, and tie a small bunny ear bow. This YouTube video by Dawn Olchefske of DOstamping shows you how to do this. I made my own bows smaller than the video demonstrates; however, you can make your own bows to be any size you wish.

6. Place a dot of hot glue just below the hanger part of your ornament. Carefully place the twine ends into the glue dot. Use your toothpick to position the twine pieces in the glue so the owl charm is hanging as you desire. Place another dot of hot glue onto the existing glue dot. Position your ribbon bow on the glue, carefully positioning it to hide the twine ends. Set aside and continue this for your remaining ornaments.

7. Add a hook, and hang on your tree to enjoy all season long!

**A variation of this ornament would be to find sheet music for music from the Harry Potter movies, and cut or tear and collage the pieces over the ornament. I think I will be doing this with photocopies of my younger son's Harry Potter violin solos music.


Comments